Windshield Replacement Day always arrives a little faster than you expect. You schedule the appointment, you get the windshield quote, you promise yourself you’ll clean the dash, and then suddenly the technician is on the way. A little preparation makes the job smoother, helps the adhesive cure correctly, and reduces the chance of rattles, leaks, or sensor headaches later. I’ve guided hundreds of customers through this process, both at mobile jobs in cramped city parking lots and in tidy shop bays with all the toys. The same principles apply either way, but the details matter.
This is the practical, experience-tested guide I share with friends and fleet customers. No mystery, no fluff, just the steps that save you time and help the installer deliver their best work.
Why the setup matters more than most people think
A windshield is part of your car’s safety structure. It supports the roof in a rollover, anchors the passenger airbag, and frames every mile you drive. If the glass, primer, and urethane sit on dust, oils, or moisture, the bond can be compromised. If the technician fights a cluttered work area, they may rush or miss contamination. If a camera bracket isn’t cleaned just right, the driver-assist system may drift and nag you with errors. Preparation doesn’t just keep the appointment short. It contributes to a clean bond line, proper sensor calibration, and good water sealing from the start.
There’s also the human element. A tech working in an organized, well-lit space with easy access to the car can focus on the craft. That means neater urethane beads, cleaner interior trim, and correct placement to the millimeter. You can’t control the weather, but you can set the stage.
Start with the right windshield quote and scope
Before the day of the appointment, make sure the replacement being ordered matches your car’s equipment. A 2019 Civic can have a dozen windshield variations. One includes acoustic interlayers to cut cabin noise, another has a heated wiper park, some have rain sensors or lane camera brackets, and many have shade bands or solar coatings. If the Auto Glass Replacement shop didn’t decode your VIN or ask detailed questions, call back. Share a photo of the lower corner of the glass that shows the DOT number and any logos, and a photo from the outside top center showing the sensor cluster near the rearview mirror. If you asked multiple shops for an Auto Glass Quote, pick the one that asked the most questions. That’s a sign they know what they’re doing and won’t arrive with the wrong part.
Ask whether your car needs ADAS calibration after Windshield Replacement. If you have lane keep assist, adaptive cruise, collision mitigation, or a small camera by the mirror, the answer is almost always yes. Some shops calibrate in-house after installation. Others subcontract or send you to a partner. Build that into your schedule. Dynamic calibrations done on the road can take 30 to 60 minutes in good conditions. Static calibrations in a bay, with targets set at precise distances, can take 60 to 120 minutes. This varies by make and model.
While you’re at it, confirm the urethane they plan to use and the safe drive away time. Quality urethanes cure to a safe strength in 30 to 90 minutes depending on the brand, temperature, and humidity. If you’re planning to drive a long highway stretch immediately after the appointment, discuss it. The safe drive away time is not a suggestion.
A few days before: set expectations and gather small things
Fielding quotes is only half the battle. A little prework now prevents scramble on the day.
- Take two clear photos of your windshield area inside and out, plus a shot of the sticker stack on the glass if you have service reminders, toll tags, RFID parking fobs, or inspection decals. You’ll likely need to reapply or replace some of these. Photos help with placement and, in the case of inspection stickers, with proving you didn’t tamper. If you have a remote toll transponder attached to the glass, order replacement adhesive strips from the issuer. Many are single-use. If you drive through a gantry the next morning and the tag is on the floor mat, you’ll get a fine and a headache. If your wiper blades are worn or streaky, buy the replacements now. A fresh windshield deserves fresh rubber. It protects the new glass and reduces chatter while the hydrophobic coatings settle. Think through calibration: if your shop requires a full tank for dynamic calibration or wants tire pressures set to placard spec, do it before the appointment. Uneven pressures can pull a car and confuse the camera during road-based calibration.
This is also the time to decide where the work will happen. Mobile or in-shop? If you have a heated garage with good lighting, mobile can be great. If your only option is curbside under an oak that loves to drop pollen, go to the shop. Adhesives and paint primers hate dust and heavy humidity. Good shops can make the best of imperfect conditions, but a controlled bay gives you the highest odds of a perfect bond and a quick cure.
The night before: prepare the car
The technician will remove and reinstall trim, vacuum, and wipe down surfaces they touch. Help them by clearing the path.
Start inside. Remove everything from the dashboard. That includes phone mounts, plush mascots, your kid’s school artwork taped to the lower corner, parking receipts, and that little ceramic lucky cat. Clear the front footwells. The tech will lean into the cabin to cut the old urethane and lift the glass. A clean, empty workspace lets them move without knocking your belongings around.
Tackle the rearview mirror area. If you have a dash cam or radar detector, unplug and remove it if possible, along with any sticky mounts or hardwired cables that drape across the headliner. Techs can work around them, but the risk of a popped wire or crooked reattachment goes up. If a wire is tucked into the A-pillar trim, make a note to tell the installer before they start. They’ll take extra care at that spot.
Check the glove box for your wheel lock key if you have locking lug nuts. Most techs won’t remove wheels for windshield work, but some calibration procedures require driving on a perfectly balanced set of tires, and a wobbly spare won’t cut it. It’s rare, but I’ve had two calibrations delayed because the car was on a compact spare with no wheel lock key in sight.
Move to the exterior. Pop the hood release so the cowl panel at the base of the windshield can be removed easily. Don’t open the hood fully and leave it, just make sure the release works. Skim the cowl area for leaves, seed pods, or dirt. If it’s packed, vacuum or brush it out. That debris falls into the work area when the moldings come off. Check your wiper arms and note their position on the glass for your own peace of mind. A photo helps if you’re curious, though good techs will mark and reset them correctly.
Finally, check for rain in the forecast. If you’re doing a mobile job in an open driveway and the radar looks angry, call the shop to reschedule or ask if they can bring a canopy. Light drizzle can be managed, but heavy rain during application is a no-go. Moisture at the bond line creates adhesion problems. If the install must happen and weather is marginal, a shop bay beats a driveway every time.
The morning of: be ready when the van pulls up
Most mobile installers run on tight schedules. Be there at the start of the window if possible, or make sure someone who can make decisions is present. If the car is parked nose-first in a tight garage, pull it out enough to open the doors fully. If you’re in a condo or office lot, secure permission for the tech to work on-site. Some properties are picky about mobile services. You don’t want a security guard interrupting the urethane bead.
Introduce the car. Point out any special concerns up front. If a plastic A-pillar trim clip broke during a prior stereo install, say so. If the cowl tabs are brittle from sun exposure, warn the tech so they can pry more gently or have replacements ready. Share where the dash cam wiring runs. Mention if the rearview mirror housing needs a twist and slide rather than a straight pull. The small details help prevent broken clips and rattles.
Then confirm the glass. Take a quick look at the new windshield before it leaves the rack. The shade band, frit pattern, sensor mounting plate, and logo should match your original. If you ordered an acoustic windshield upgrade, you’ll usually see a small acoustic logo near the DOT mark. If you have a heated wiper park, you should see the embedded heating element. If anything looks off, pause. It is cheaper and faster to swap a panel before installation than to pull a freshly bonded one.
What the technician will do, and how to help without hovering
A good install follows a rhythm, and it helps to know the beats. The tech will protect the hood and fenders with covers, remove wiper arms and cowl trim, cut the old glass out using a wire or a cold knife, and lift the glass away. They will scrape the old urethane down to a thin, smooth base, leaving some as a substrate for the new bond, then clean and prime any scratched paint areas. The glass will be prepped on a stand: degreased, primed at the ceramic edge, and lined up for placement. They’ll run a fresh urethane bead with the right triangular profile, set the glass, wiggle lightly to wet out the bead, and tape it in place if needed while the moldings are reinstalled.
Your job is simple. Keep the work zone free. Don’t open and close the doors or slam the hood during bonding. Avoid leaning on the fenders or pushing the glass from inside to “test it.” If you need something from the car, ask the installer when there is a natural pause. Most are happy to accommodate at a safe moment, and they appreciate not having their bead bumped mid-set.
If you have a specific request, like leaving a little more clearance for an aftermarket mirror mount, ask early. The tech can adjust placement a millimeter or two if it doesn’t violate spec and still maintains the correct seal. Speaking up after the bead is down is too late.
The one checklist you actually need
Here’s a short, practical checklist I hand to customers. It covers the small things that slip through the cracks.
- Clear the dashboard, front seats, and footwells. Remove dash cams, phone mounts, and wires at the mirror area. Pop the hood release and clean leaves from the cowl. Park with doors able to open fully, and avoid trees overhead if mobile. Photograph stickers and tags on the glass. Have replacement adhesives ready for toll tags. Confirm the glass part matches your features, and that calibration is scheduled if needed. Plan for safe drive away time. Ask the tech for the curing window based on that day’s temperature and humidity.
That’s the entire preparation boiled down. Everything else is nuance.
Weather, temperature, and curing: plan your day around the adhesive
Urethane cures chemically. Heat and humidity accelerate curing, cold and dry air slow it down. Most high-quality automotive urethanes list a safe drive away time for 73 degrees Fahrenheit at 50 percent humidity. On a chilled, dry morning, that same product may need twice as long to achieve the same strength. A seasoned technician selects a product and bead size for the conditions, and some carry fast-cure urethane for cold days. But safe drive away time is not the full cure. The bond continues to gain strength over the next 24 to 48 hours.
For your part, treat the vehicle gently during that period. Avoid slamming doors. If you must close a door with windows up, use a feather touch. Pressure spikes can push on the fresh bead. Keep speeds reasonable if the car leaves the bay right at the safe window, and avoid wash tunnels or high-pressure spray at the edges for a couple of days. If rain is forecast within the first few hours after installation and you’re going mobile, ask the tech whether a rainproof tape and a canopy will be used, or consider rescheduling. Light rain after the bead skins over is usually fine, a wind-driven downpour during application is not.
Calibrations: what to expect and how to avoid false alarms
Advanced Driver Assistance Systems are sensitive to windshield placement. A shift of two millimeters or a degree of tilt Port Royal windshield replacement can change how the camera reads lane markings. If your vehicle requires calibration, the technician or partner shop will use OEM procedures or validated aftermarket equipment to bring the system back into alignment.
Two flavors exist. Static calibration occurs in a controlled environment with measurement mats and targets set at defined distances. The car sits level and at a specified fuel and tire condition. Lighting must be uniform. Dynamic calibration happens on the road, where the camera watches real lane lines at defined speeds for a set time. Some models need both.
Help by ensuring a few basics. Tires at placard pressure. A reasonably full tank if the OEM requires it. A clean windshield after install with no foggy glass cleaners leaving residue in front of the camera. If dynamic calibration is planned, pick a route with clean lane markings, little traffic, and speeds within the required range. Rural four-lane highways are perfect. Downtown with construction paint, not so much. If the calibration cannot complete because of surroundings, it is not a failed system, just a poor environment. Try again on a better road.
After calibration, expect the dash to be free of ADAS warnings. If a message persists, don’t ignore it. Sometimes a small bracket behind the mirror needs reseating, or a target was slightly off. Good shops stand behind the process. I’ve had vehicles that passed a dynamic calibration on a sunny day, then threw a lane assist error during a rainy night because the camera focus picked up a smudge on the inside glass. A quick interior clean fixed it.
Protecting your interior and getting it back to normal
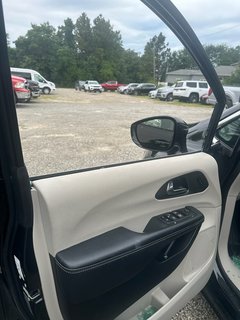
Quality techs bring seat covers, fender covers, and vacuum. Still, interior messes happen. Rubber crumbs from old urethane, a small smear of primer on a glove that brushes a pillar, or plastic shavings from a stubborn trim clip are the usual suspects. Walk the car with the installer at the end. Run a finger along the dash edge to check for stray adhesive. Look at the A-pillar trim for gaps or bulges that signal a clip not fully seated. Sight across the top edge from outside for a uniform gap left to right. If you see something, speak up kindly and immediately. Corrections are easiest on the spot.
Your mirror won’t always go back with the same tension if the mounting plate design changed from OEM to aftermarket glass. That is rare, but I’ve seen subtle differences with some models. If you notice a wobble, mention it. The fix can be as simple as a shim or a swap to a different glass vendor.
Wiper arms should park evenly. If you see one resting too high, ask for an adjustment. It takes two minutes and avoids streaks or chatter. While you’re at it, confirm the cowl panel is fully seated. Some panels require a small forward push and a click. If a corner lifts, water can pool and funnel into the cabin filter area during a car wash.
Sticker transfers and toll tags without drama
Transferable stickers are easy. Non-transferable inspection decals vary by state. Some states allow a windshield change sticker or a free reissue. Others expect you to visit an inspection station. Keep your photos and your old glass receipt handy just in case.
For toll tags, clean the glass with alcohol where you plan to stick the new adhesive. Place the tag exactly where the highway authority recommends so RFID reads cleanly. On vehicles with metallic tint or heating elements, placement matters. Too high into a dotted shade band or too low under the frit can reduce read reliability. Most agencies publish diagrams for popular models. Five minutes here saves months of “why did I get a violation notice” calls.
Special cases that deserve extra attention
Not every car behaves the same. A few patterns recur that are worth calling out.
Luxury sedans with acoustic glass: Acoustic interlayers noticeably reduce wind noise on the highway. If your car came with acoustic glass and you replace it with a standard windshield to save money, expect a small but audible change in cabin quiet. It’s not night and day, but at 70 mph, you’ll hear an extra hiss. If you care about long-distance comfort, specify acoustic in your Windshield Quote.
Older vehicles with pitted glass: If your old windshield had years of sand pitting, the new one will feel like a revelation. It will also highlight worn wipers and old spray nozzles that were compensating for haze. Replace the blades, and consider cleaning the nozzles with a pin or swapping them if spray patterns are weak.
Trucks with body flex: Some trucks flex noticeably over driveways and ramps. The installer may recommend additional cure time or a specific urethane bead size to handle movement. Follow their advice and avoid off-road articulation for a couple of days.
Classic cars and bonded reveals: On classics with scarce trim clips, originals can snap and replacements may be low quality. If your pride and joy has hard-to-find molding, source clips ahead of time or expect a delay. A patient install with the right clips beats slamming it together and fighting wind noise later.
Aftermarket tint at the top edge: If a tint strip overlaps the frit band where the urethane bonds, the tech must cut through it. The new glass will be clean, and the tint strip will be gone. Plan to re-tint if you love that look.
Price, value, and what a good Auto Glass Quote should include
There is a spread in pricing for Auto Glass Replacement. A bare-bones Windshield Quote may look tempting, but ask what is included. OEM glass can cost 20 to 80 percent more than aftermarket. On some vehicles, aftermarket panels are excellent. On others, the curvature or camera bracket tolerances differ just enough to cause glare or calibration headaches. Local experience matters. A shop that installs ten of your model a month knows which panel behaves best.
A solid quote should state the glass brand, whether moldings and clips are new or re-used, the urethane brand and safe drive away time under expected conditions, disposal of the old glass, and calibration method with any travel charges. If rain delays are possible for mobile service, ask how they handle rescheduling. If your vehicle requires reprogramming a rain sensor or window indexing, confirm that they perform those steps.
Saving money is sensible, but be cautious about bottom-barrel quotes that gloss over calibration or promise to reuse every clip. Rattles and leaks cost more to fix later. A fair midrange price from a shop that answers specific questions and schedules calibration correctly is usually the best value.
Aftercare: the first 48 hours
Once the glass is in and the adhesive has reached safe strength, the real test is the next couple of days. Small signs tell you whether everything settled well.
Expect the urethane bead to off-gas slightly. You might catch a faint smell for a day. That’s normal. Avoid power washing and automated wash tunnels for at least 48 hours, and keep the painter’s tape on for the period your tech recommends. If your installer used tape to hold moldings, don’t remove it early because it offends your eye. It’s there to prevent the molding from lifting while the adhesive sets.
If you hear a whistle at highway speed, note when it occurs. If it starts at 45 mph and gets louder with crosswinds, it’s often a molding mis-seat or a small gap near a trim corner, not the glass bond itself. Shops can diagnose and fix that quickly. If you see water along the upper edge after a heavy rain, schedule a leak test. Good shops use a controlled water test or a smoke machine around the perimeter to find the path. Don’t live with it. Left alone, water can drip behind the dash and corrode connectors.
For ADAS, watch for any camera or sensor errors over a variety of conditions. Night glare, heavy rain, and bright low sun stress the systems. If warnings appear intermittently, document the conditions and call the shop. Most calibration warranties cover a return visit.
What I tell every customer at the handshake
People ask the same final question: is there anything you wish more customers did before we show up? Three things. Clear the dash and wires at the mirror so we don’t tug your gadgets. Park where doors can swing wide without hitting a wall. And budget an extra hour on your calendar for calibration or curing, even if you end up not needing it. That buffer takes the pressure off everyone and produces better work.
Windshield Replacement isn’t glamorous, but it’s foundational. The right preparation sets up a tight seal, a quiet cabin, and cameras that see the road exactly as designed. Whether you chose the shop based on the most detailed Auto Glass Quote or a trusted referral, meet them halfway. An organized car and a small window of your time is all it takes to make Windshield Replacement Day simple, safe, and done right.